Thursday, December 1, 2016

Generation Good & Coffee&Chocolate Party!!


I had the chance to host a Generation Good party and combined it with a House Party that involved Starbucks and Lindt chocolate!! It was a fun night making coffee and hot chocolate, eating different types of Lindt goodies, and then playing bingo and winning prizes from Seventh Generation, Bobble, & Annies! It's always nice being able to fellowship with friends and just be able to relax a little!!


Goody bags provided from Seventh Generation and filled with samples and coupons!


Fun in the kitchen making coffee! Peppermint Mocha Lattes, Caramel coffee and hot chocolate! 5 different types of Lindt chocolates, and some cheese & crackers, fresh fruit, and shortbread cookies!


Then we watched a short video about Seventh Generation's quest to change the law on putting an ingredient list on household cleaners and played a fun little bingo game that gave us some healthy home tips about everyday things. Thanks to Seventh Generation for supplying awesome free prizes for the night! The ladies went home with some fun items!

*I received free supplies from HouseParty and Generation Good to host the parties, but the fun and opinions were all my own!!  


Tuesday, October 18, 2016

Seventh Generation sampling

I recently had a chance to try and review some Seventh Generation baby wipes. I love the texture and quality of them. For me, bigger wipes aren't always the best or easiest to use. But, these were the perfect size for messy bottoms and faces.
While the price point is higher than your normal brand of wipes, if you're looking for a wipe that is free of parabens, alcohol, and fragrances, try out these wipes in your next shopping trip!!

*I received these samples for free from Generation Good, but the opinions are completely mine.

Tuesday, January 6, 2015

Happy New Year!

Merry Christmas and Happy New Years!


It's been a while since I've posted, but that only means I've been busy, right? We stayed home for Christmas this year, and had friends over for dinner. It was so nice actually having room in our new house to have a couple families over! There were 9 little kids running (and crawling) around, and the house was full of giggles and then tears as little ones got sleepy :)

We also got some pictures, mirrors and a clock hung up on our walls over the break. And got the butcher block for the kitchen island trimmed and oiled! Our kitchen is so close to being done, and I can't wait to show you all the before and after when it is!

I also made some gifts this year for family and friends. Such an easy and inexpensive gift, that can be personalized to what each specific person likes! Here are a couple of them:


This "O Come Let Us Adore Him" is just printed on heavy cardstock, with white lettering on a black background. It's trimmed, and then glued using spray adhesive onto a 7x7 piece of wood that's about an inch thick and painted black. So easy!! This is a picture from the recipient of where she placed it!


This one, I forgot to take a good picture of it, sorry! It was printed on an 11x17 piece of cardstock and then trimmed down to 9x9. We have a local UPS store that does printing fairly inexpensively, but found that their "new" printer was eco-friendly, and it didn't print a very dark black, which didn't match the black painted wood, so my husband had to print these for me at work. We have another print shop in town that I may try next time!

We've been spending the New Year staying warm in this frigid weather. Snuggling on the couch and watching movies.


Playing with toys.


And, doing some testing for new products!!


If you haven't heard of Expo before, you can sign up, start doing video reviews of products you have, and then you'll start getting surveys to screen you for new products! If you're picked, they'll send you the product, and after you've used it for a while, you create a video review of it, upload it, and you're done and get to keep the product! I've been a member for 2 years now, and some of the things we've received to test (and KEEP!) are: Huggies diapers, a Baby K'tan carrier, a Phillips Norelco wet/dry razor, Downy fabric softener and Unstoppables, an HP Envy Rove 21" mobile pc (that thing is awesome!! and, it currently retails for $1,000!!), Dr. Scholl's inserts, cleaning wipes, Kleenex pouches, and more!!

So, if you're not a member, click this link and start reviewing!! It's a fun, easy way to test new products!! Oh, and you get points for taking the screeners, by submitting video reviews and such, and you can redeem those for gift cards, too! We've earned about $60 in gift cards on top of all the free products!


Wednesday, December 10, 2014

Chocolate Chip Cookies (dairy free!)


I've been making and freezing cookies this week to bring to campus next week for exam week. The latest, Dairy Free Chocolate Chip Cookies, are delicious! I know there are some students with dairy allergies, so I thought I'd cater to them a little!


These are crispy around the edges, and slightly chewy in the middle! The perfect cookie!

I used BetterBody coconut oil (found at Wal-mart, here in WI) and dairy free chocolate chips (from a friend that works at the local chocolate factory). Enjoy Life makes a brand of dairy free chocolate chips, and I've read that some other "normal" brands are also dairy free.


This recipe was adapted from here.

I suggest making sure the coconut oil is quite soft. Mine was barely soft enough to smash into the measuring cup, and I ended up with some lumps, even after mixing quite well. Want to see what lumps of coconut oil look like in baking cookies?


Not pretty. But, it still tasted yummy!! I just had to eat all those ones, of course.

Also, my dough was so crumbly, I thought I'd failed, but, after scooping and pressing into balls, they actually baked nicely!!


Dairy Free Chocolate Chip Cookies

  • 3/4 cup granulated sugar
  • 3/4 cup brown sugar
  • 1 egg
  • 1/2 cup very, very soft coconut oil
  • pinch of salt
  • 1 tsp baking powder
  • 1 tsp baking soda
  • 1 tbs vanilla
  • 1 1/2 cups all purpose flour
  • 1 cup chocolate chips (or more, it never hurts!)
Preheat oven to 350. 
In medium bowl, mix together softened coconut oil, egg, vanilla and both sugars with electric mixer (or stand mixer)for around 2 minutes on medium speed.
In a separate bowl combine all dry ingredients & then slowly incorporate into the wet mixture.
Mix in chocolate chips by hand.
Line a cookie sheet with parchment paper.
Use a cookie scoop to make balls, then rolls between hands and flatten slightly.
Bake for 8-10 minutes, or until the outside of the cookies have browned a just a bit. 
Let cool on cookie sheet for 5 minutes, them remove to wire racks.
Best eaten when warm from oven, of course!!
These can also be frozen after they are completely cooled in an airtight container!
Makes about 3 dozen


N is always at the oven, watching, tapping, and licking the glass. 


Enjoy!!!!!!

Tuesday, December 9, 2014

Spritz Cookies


If you've never made Spritz Cookies, quick, go out and buy a cookie press and make them! I have this cookie press that I got for Christmas last year.


It's so much nicer than the old metal one that I had, where the disk kept popping off. That one is long gone, now! This one comes with a little booklet in it with a few recipes. We followed the Vanilla Spritz recipe, with a few minor changes. I'll post the recipe below, in case you already have a cookie press! I had two good helpers this morning.


N was going to help, 


Then decided to play instead. 


He did sit and watch J stir up the dough, though!


I have the cutest redheads. Seriously.


Isn't it gorgeous?!


Oh, just laying on the countertop watching.


Anyways, the recipe:

1 cup salted butter, room temperature.
1 cup white sugar
1 egg
2 1/2 teaspoons vanilla
2 1/2 cups all purpose flour

  • Preheat oven to 375. 
  • Mix butter and sugar together in large bowl until fluffy.
  • Add in egg and vanilla. Mix well.
  • Stir flour in by hand. Dough will seem a bit crumbly.
  • Roll a section of dough into a log and insert into cookie press, fit with desired disk.
  • Press the dough out onto a non-greased cookie sheet. I found it helps a little if you freeze the sheet before pressing cookies onto it.
  • Decorate with colored sugar if you want.
  • Bake for 8-10 minutes until very lightly browned around the edges. 
  • Don't let cookies cool on sheets at all, remove while still warm to wire racks to cool.
  • Store in an airtight container for 4 days or freeze and eat later! 
  • Makes about 7 dozen cookies.


Friday, December 5, 2014

Influenster

I joined Influenster a few months ago, not really knowing what it was. After doing a few surveys and answering some questions, I got an email saying I was receiving a VoxBox. I received a full sized bottle of Vaseline Intensive Care lotion in the mail to test and review!


I have dry skin, and with winter here and the heat on all the time, my skin is even drier! This lotion does not feel greasy or tacky after applying. It goes on every morning, and it moisturizes completely! I have eczema, so I love the fact that it's unscented. It does not irritate my already sensitive skin at all.

Overall, I think I'm going to need a new bottle, because of all the use this gets! 


*This was a complementary product received to test. All opinions are my own.

Cake Balls

I made cake balls for the very first time a couple weeks ago. Oh. My. Not only are they fairly simple to make, but they taste amazing! At my wedding, we had a dessert reception, and one of the ladies at church made these. But, seeing as I was too busy talking to people and walking around, I never actually got to try one. 5 years later, I finally made them and tried them! I had some college girls over to help roll them and dip them. It was a fun, learning experience for all of us.


I don't have step by step pictures, but the instructions are fairly easy!

1. Bake your favorite cake according to the box directions.
2. Let cake cool completely.
3. Crumble cake up and place in mixer bowl (I use my Kitchen Aid mixer for this, it reduces the amount of frosting you have to add, and does all the work for you!).
4. For white cakes, you'll use about 1/2 container of frosting. For chocolate cakes, it's a more like 2/3-1 whole container of frosting. Add frosting to mixing bowl, and, using your paddle attachment, start the mixer on low, and then bump it up to the 2nd or 3rd speed. Continue mixing until frosting is evenly distributed.
5. Place in bowl and cover. Let sit in refrigerator for an hour at least. Longer won't hurt it, if you happen to forget about it. Not that that would ever happen with little ones running around the house...
6. I have this Baker's Secret Cookie Dough Scoop and I use it for everything!! It's the perfect size for cake balls, cookies, to fill up a mini muffin pan, meatballs... The uses are endless! Anyways, scoop your cake mixture into balls and place on a wax paper lined cookie sheet.
7. Melt your chocolate. Now, you can use melting wafers or real chocolate chips. If using melting wafers (this kind), just follow the directions on the back of the package. If using chocolate chips, place 1 cup in microwavable bowl, add 1 teaspoon of coconut oil or shortening, and microwave on high for 30 seconds. Remove, stir until bowl is no longer hot, then microwave again if needed for 10 seconds at a time, stirring completely each time.
8. Place one cake ball in the melted chocolate at a time, and using two plastic forks broken like this:


Roll the cake ball around until completely covered. Let extra chocolate drip off for a few seconds and then place on wax paper. If you want to put sprinkles on top, now is the time before the chocolate hardens back up.
9. Finish remainder of cake balls. You will probably have to put the chocolate back in the microwave once or twice for 10 seconds to warm it back up.
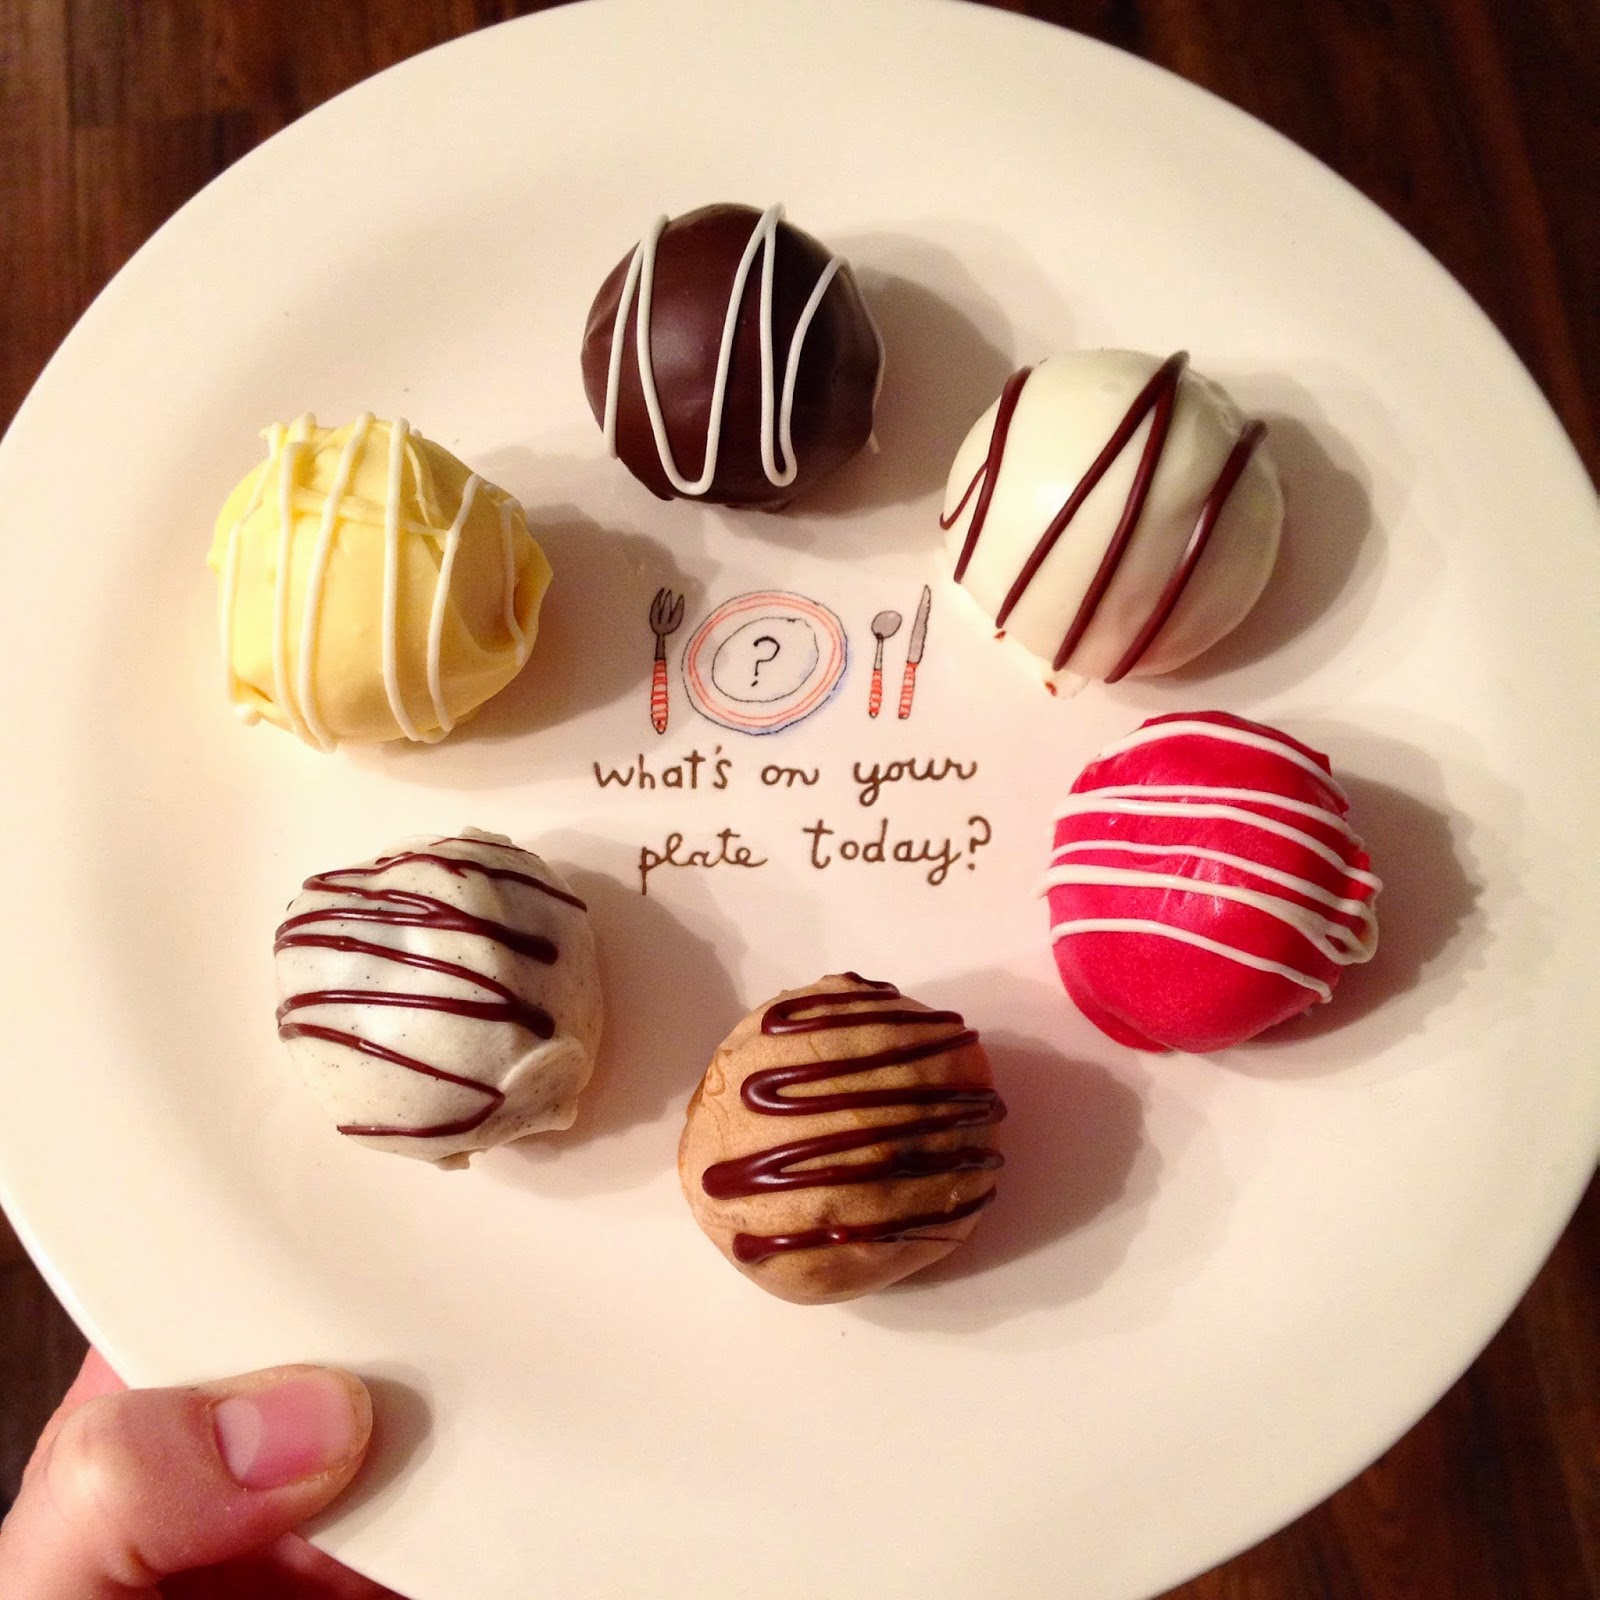
10. Put in cool place to harden completely. You can also place some melted chocolate of a contrasting color in a sandwich baggie, snip the end off, and drizzle it on top of some already hardened cake balls.


These are great for cookie exchanges, neighbors, friends, hiding-in-the-pantry snacks so your little ones don't see. And the combinations are endless! Chocolate cake with chocolate frosting dipped in dark chocolate. White cake with vanilla frosting dipped in milk chocolate. You could even do a spice cake mixed with cream cheese frosting dipped in white chocolate. Yummmmmmy.

Enjoy!!